Testing
All apps created in the Publisher Dashboard are set to test mode by default.
Test mode limitations:
- Survey wall is not available
- Interactions are limited
- Only test devices can access content
Purpose: Verify the integration is properly configured before going live.
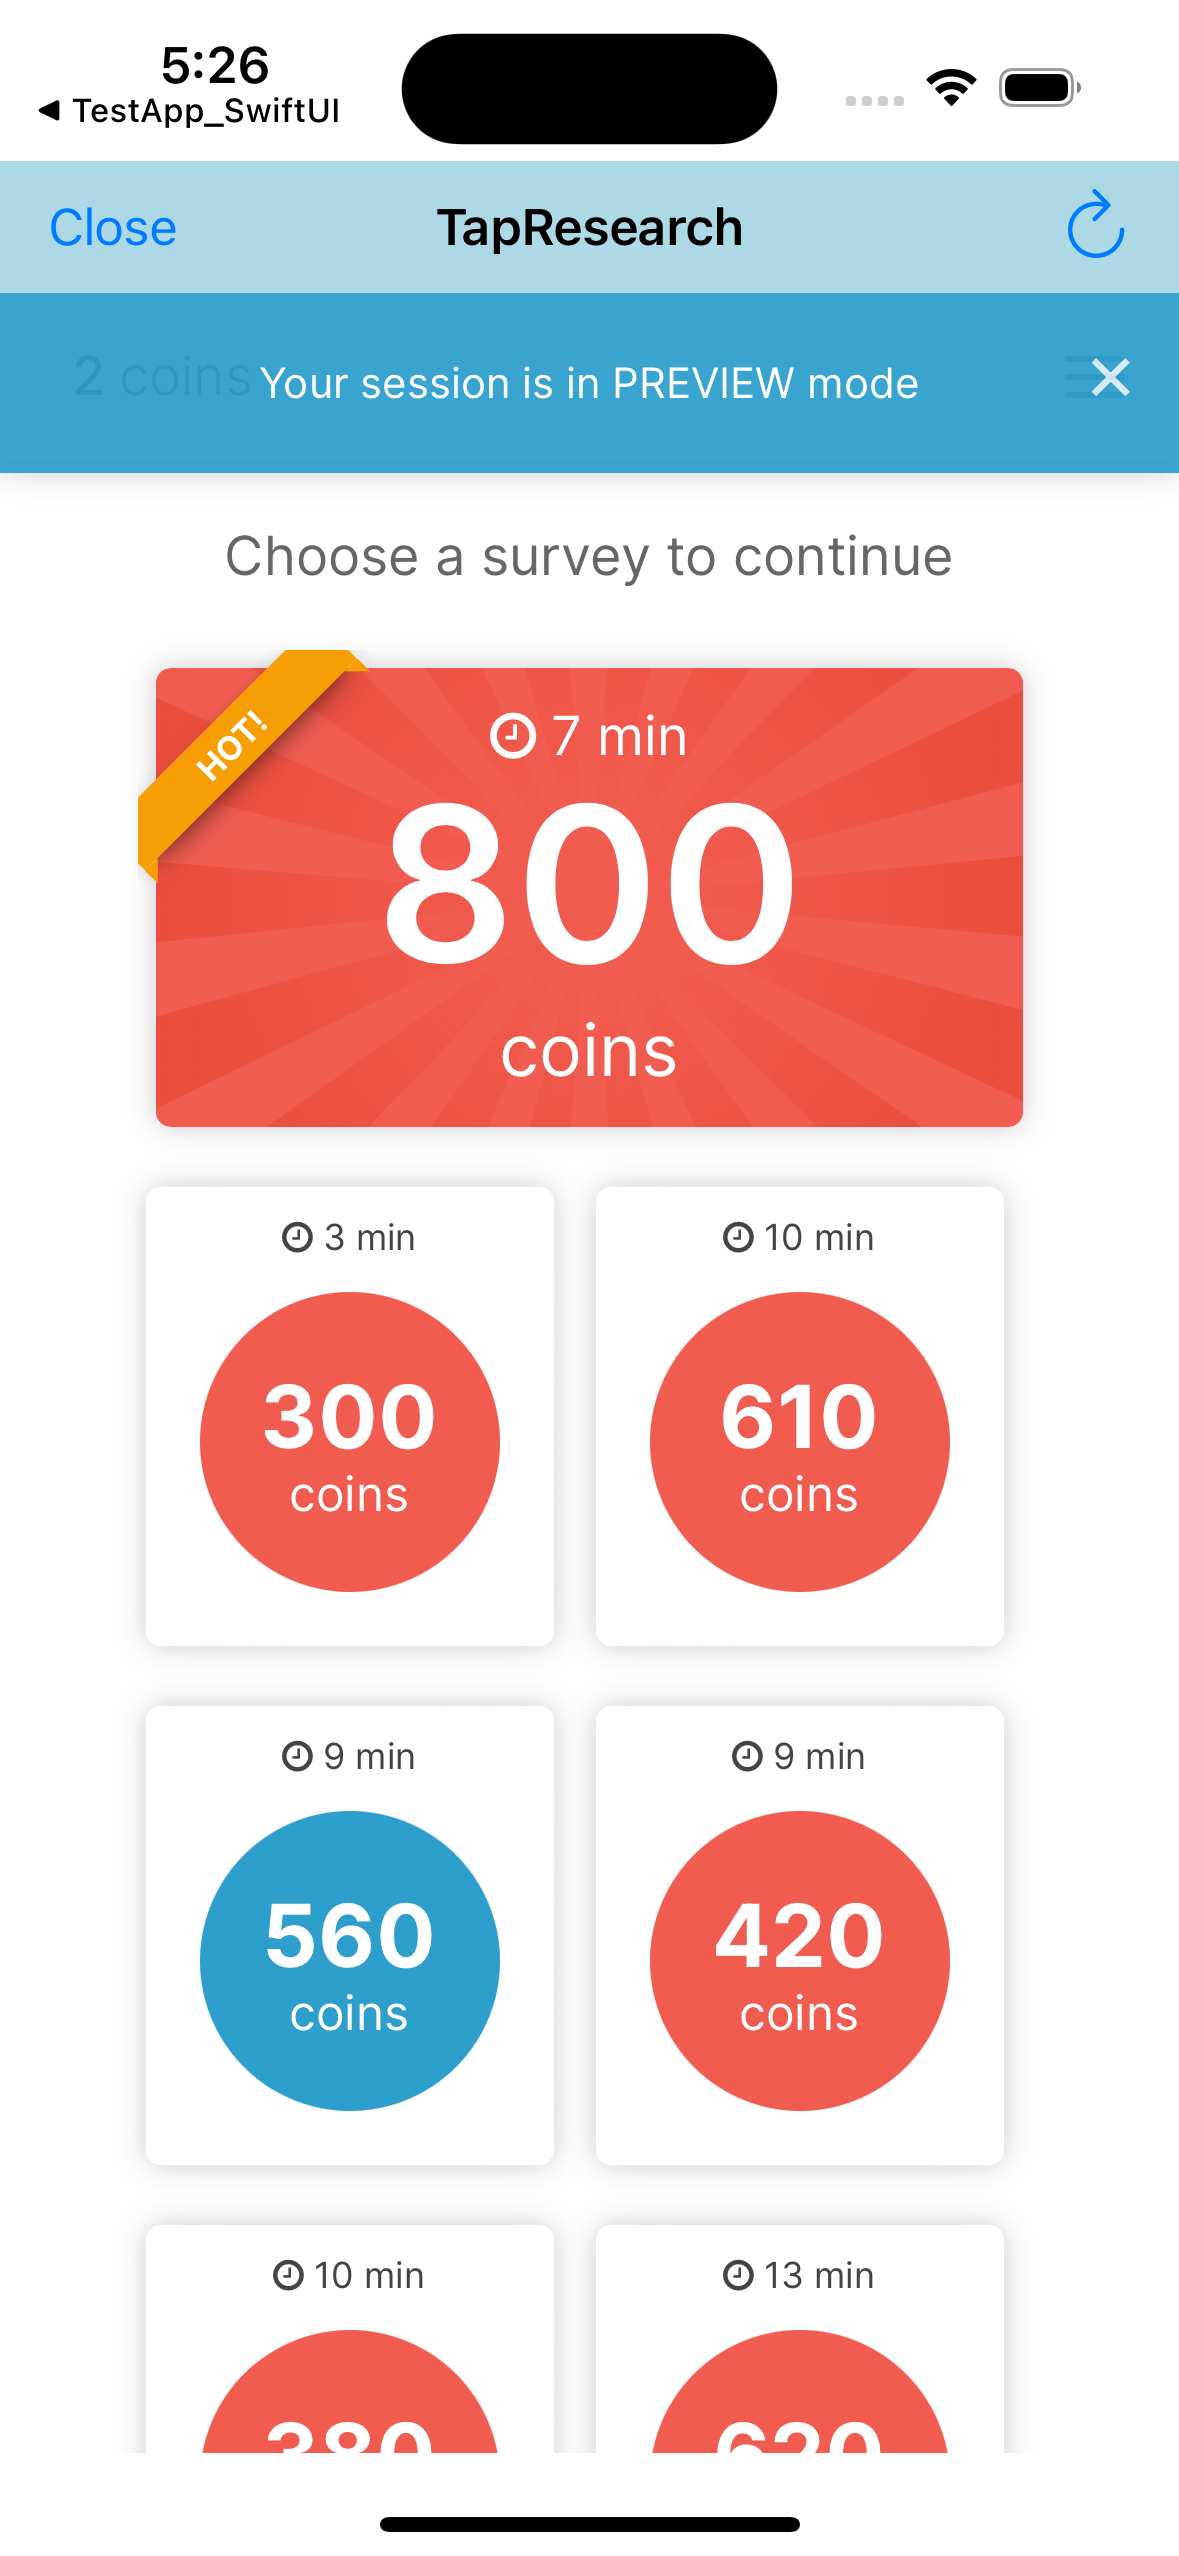
Test mode, test devices, and going live apply to all integration paths. The verification walkthrough below uses the SDK survey wall as the example; with the Hosted Link, Eligibility API, or Survey Feed API, you verify through that path's own survey flow.
Steps to Go Live
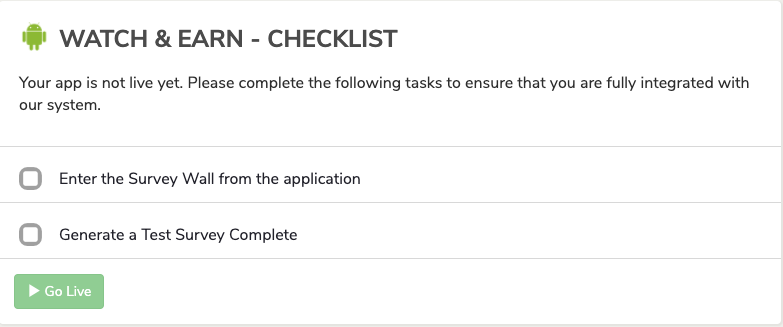
Once you set up a new app, select the Testing link in "App Overview" to navigate to the app checklist.
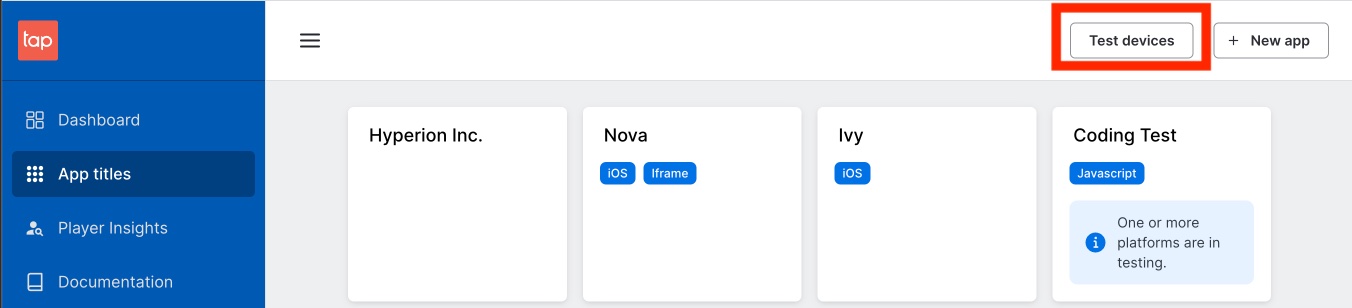
Add a Test Device
Only test devices can access apps in test mode.
To add a test device:
- Go to the Publisher Dashboard
- Click New Device
- Enter:
- Device test name - A descriptive name for the device
- Device identifier - Use one of:
- iOS: IDFA
- Android: Advertising ID
- Or a unique user identifier

Test Mode
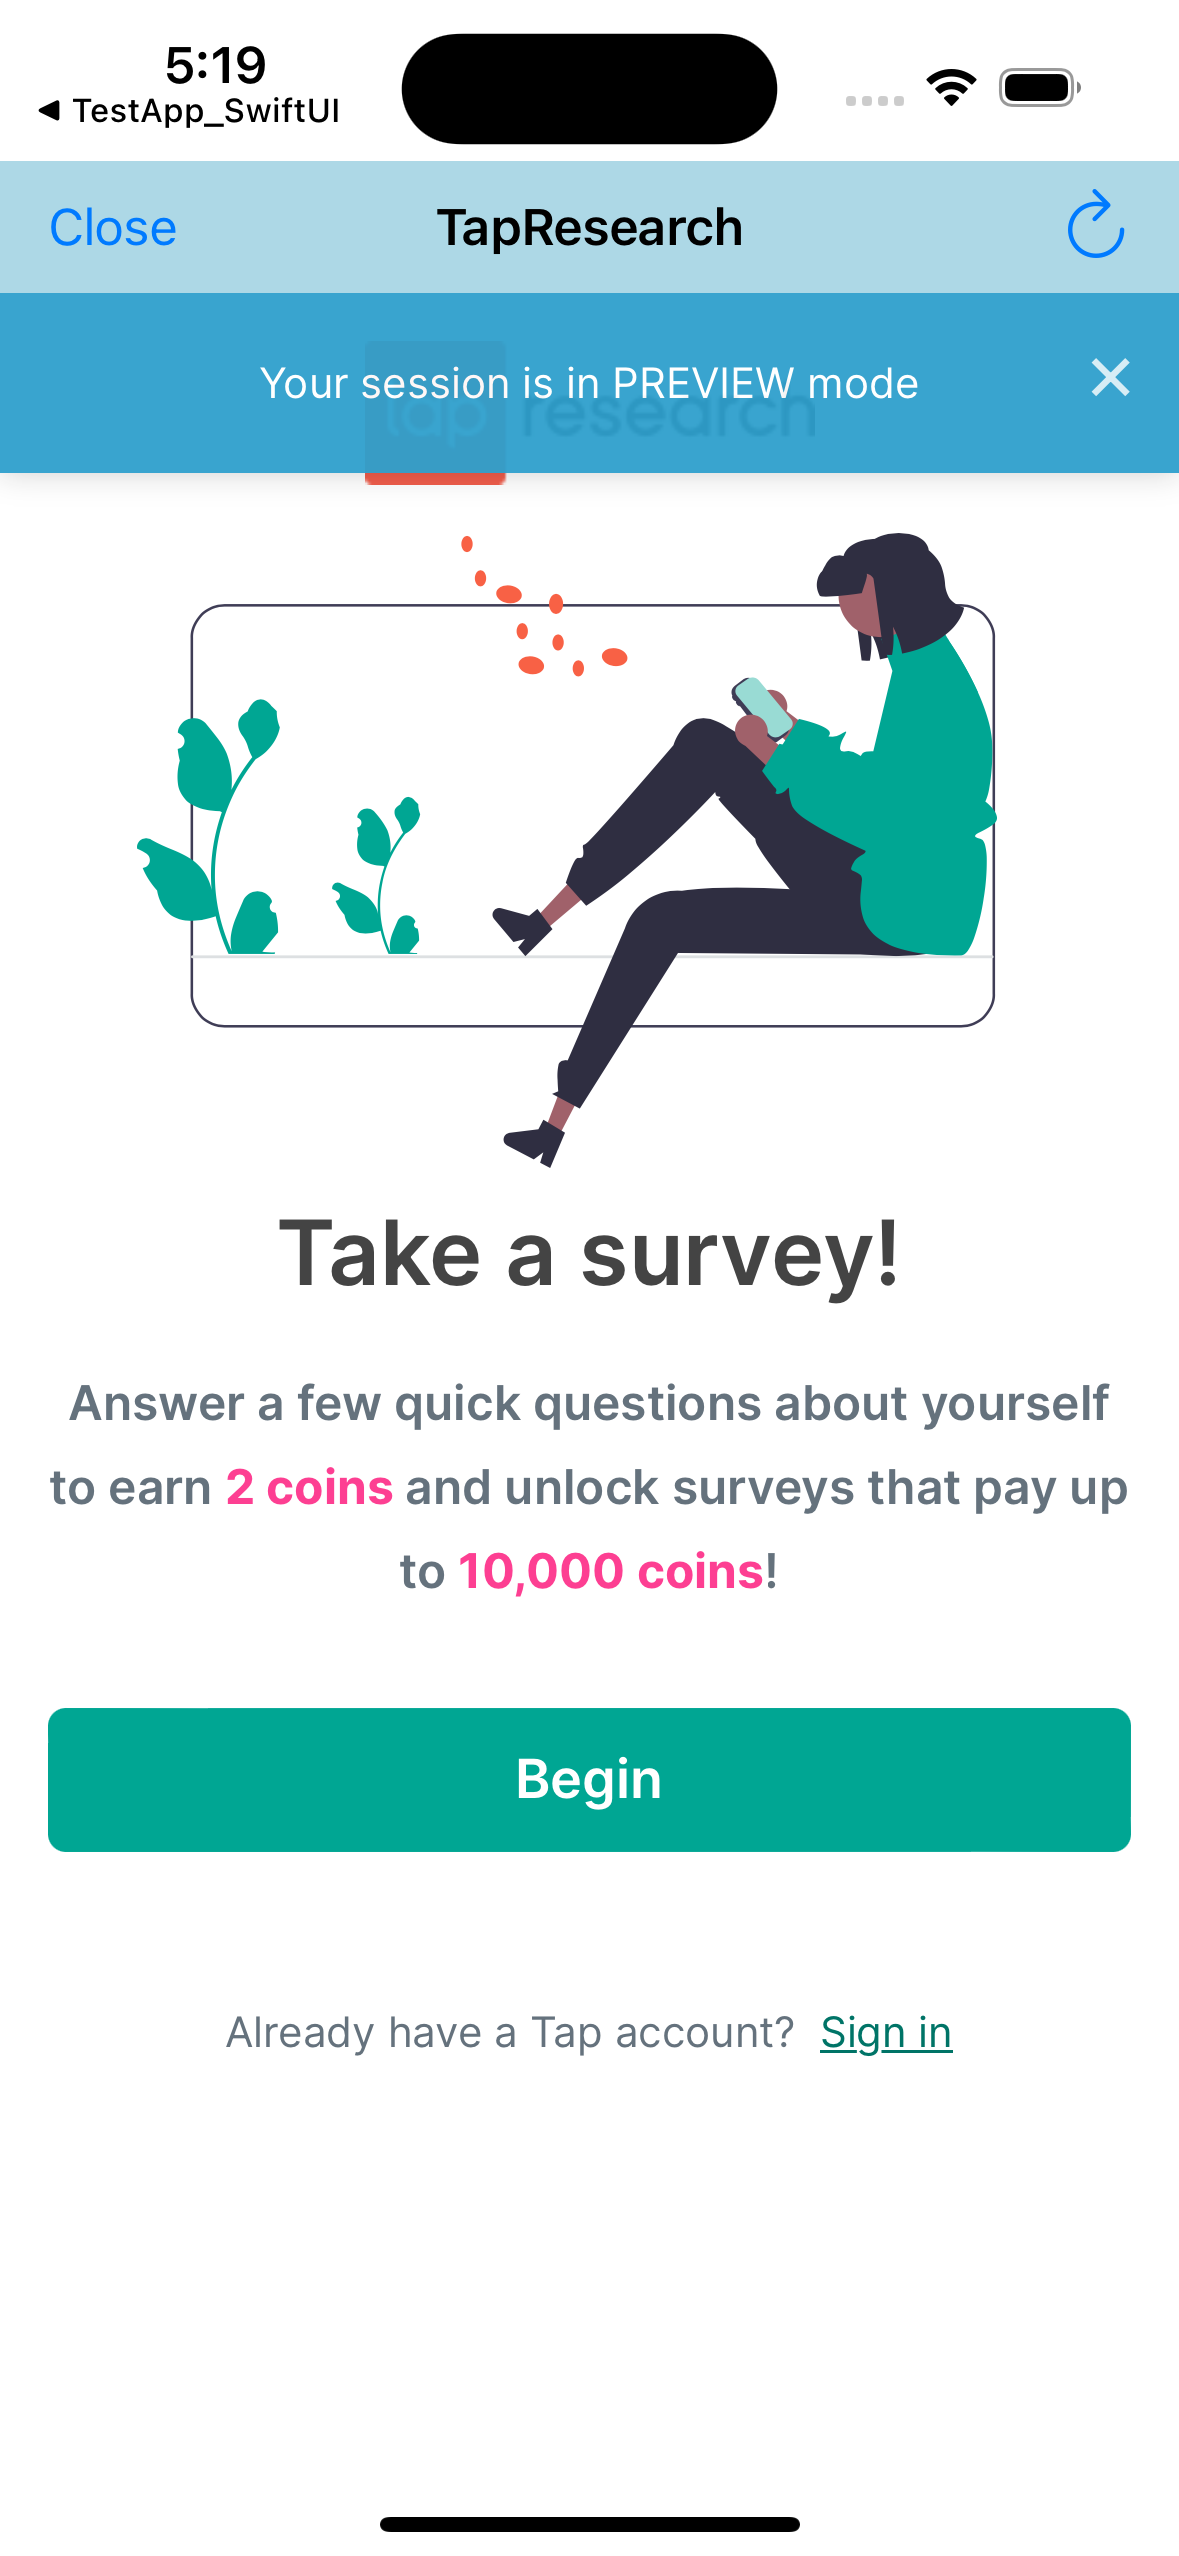
Once the SDK is initialized, open the survey wall to enter test view.

Note: If you're testing from an unsupported country, you'll default to the US and see US surveys. However, you may encounter issues taking surveys due to IP location restrictions.
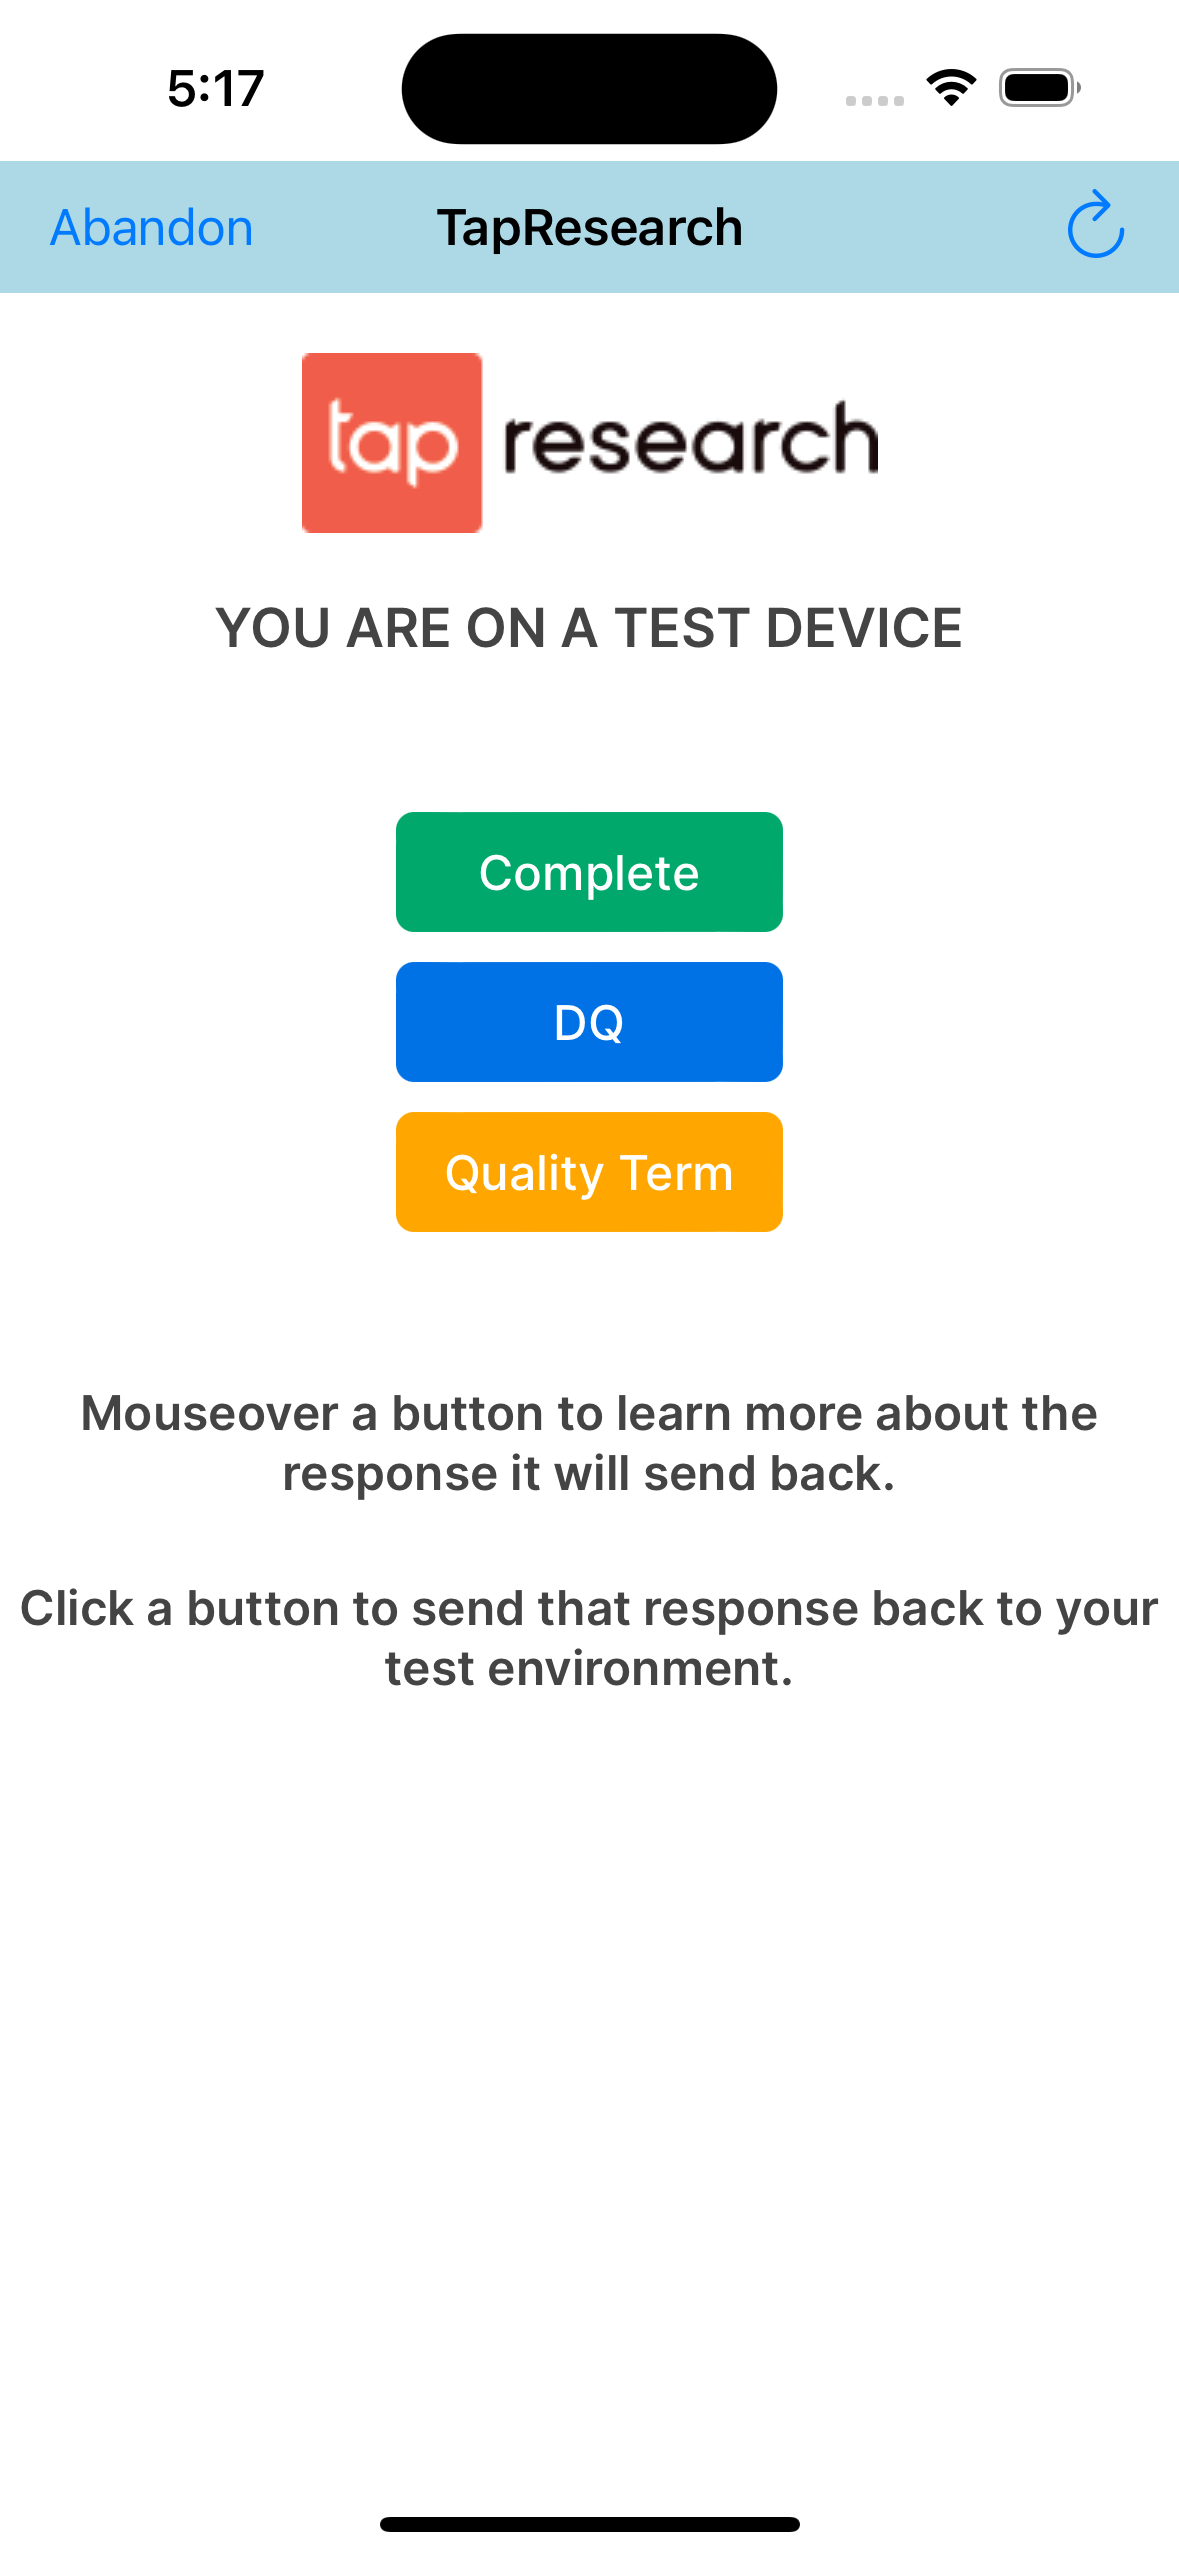
Complete the test: Click the Complete button to generate a test survey completion. This will trigger a callback.
QA Checklist
Once your test device is added:
- Complete a test survey
- Complete all other test tasks shown in the UI
Live Mode
To go live:
- Navigate to App Overview → Testing
- Click Go Live
Testing After Going Live
When your app is live but you're still using a test device:
If you haven't completed the prescreener:
If you've completed the prescreener:
Normal live mode (non-test device):
